Tuesday, October 19, 2010

This is What Delicious Looks Like


Try not to drool on your keyboard.

Consider this a sneak preview of a post to come. Until then, I'll be in NY for a few days and, when back, putting the finishing touches on the VERY exciting furniture rearrangement that took place last weekend. Things got turned upside down (in a good way) and I am so very pleased with the results. MAJOR thanks to Blake and Jeff for helping me move things. I promise a "house" photo tour is in the works. Soon.

Friday, October 15, 2010

Martha Martha Martha

I Tivo the Martha Stewart Show on the Hallmark Channel. Mock me if you want. I don't care. I like good things.

She made these with the pastry chef from the Four Seasons Restaurant. I'm obsessed.

The options for filling these things are basically endless.
This has Thanksgiving written all over it.


picture from marthastewart.com


Thursday, October 14, 2010

A "Petit" Déjeuner in the Very Literal Sense

It is a fairly well established fact that the French do not screw around when it comes to food. I can hardly blame them. If I had my own country, it also would probably have lots of good food and lots of vacation days. It's not a bad way to be. If you ignore all the other social, political, and economic issues, of course.

One of the things I love most about French food is how it repeatedly and excellently elevates the humble to the sublime. Is there anything better than sitting outside a cafe on a sunny day with a fresh crusty baguette smeared with a dab of ripe, semi-stinky cheese, accompanied by a glass of chilled rosé and some delightful company? I think not.

I am not entirely sure where I heard about the classically French combination of radishes with sea salt and butter but I am a convert. It's not so much a recipe as an assemblage of four simple components: radishes, thinly sliced - it helps to have a mandoline for this and if you do, set it to 1/8"; baguette, also sliced; softened (but not melted) butter, ideally President if you really want to be authentic but good unsalted American butter will do; and fleur de sel, the kind of sea salt you can crunch up between your fingers. I like Maldon.


I can't eat a radish without thinking of Nana, who always, ALWAYS, had them thinly sliced in the green salad she served alongside dinner. I have always loved the freshness and crunch of radishes although I will say this recipe works slightly better with the milder spring radishes than the heartier fall ones. The fall ones have a bit more bite. Nevertheless, if you like radishes, you can solve this seasonal issue with just a tad more butter and salt.

Assembly of this little lunch treat is as follows:

1. Spread baguette slice with butter. You want it to be visible on the bread like a spread, not scraped into the crumb. But not too generous with the butter or it'll kill the flavor of everything else.

2. Sprinkle fleur de sel over the butter, crunching up the little salt pyramid-flakes into smaller bits. If you don't know what I am talking about you are not using the right salt. You can certainly try this with kosher salt or sea salt ground from a salt grinder but I can't promise it will taste as it should. Please do not use normal iodized salt. In a dish with so few ingredients, the quality of each matters that much more, so I am going to be unapologetically snobbish about this salt thing.

3. Layer the radishes on top. Just one layer is fine, with a little overlap. Press them gently into the butter.

4. Take a bite. If the flavors do not wow you, try a little more salt on the next one. You'll know when you have the right proportions because it will be delicious. It's an art, not a science.


 A perfect little Saturday lunch.


Tuesday, October 12, 2010

One Benefit of Adulthood

Is that you can eat what you want, when you want. Tonight for dinner I had cookies. Yes, for dinner. I know it was dinner because the cookies were accompanied by a glass of wine. And I was seated. Food + wine + a seat = dinner.

It was just one of those days. And I wanted to cook. Luckily, God presented me with the most painfully boring conference call I've been on in...oh...years. (Thanks, buddy!) I therefore had plenty of time to read my RSS feeds. One of these is The Kitchn via Apartment Therapy, which usually overwhelms me because at any one time there are 60+ new posts in the feed list. Information overload for sure.

However, today, I had nothing but time, sweet time. And I ran across this. Can you say yum?
I thought you could.

Having been burned before, I called Whole Foods in advance to confirm that they did actually stock sweetened condensed milk. Despite not having marshmallows, they do apparently carry preserved sugar-milk in a can and acted like I was an idiot for asking. Whatever, Whole Foods.

Here's the recipe. It does indeed make 4 dozen. Unless you eat 3 cookies' worth of dough. And then it makes 45. (It does, however, make a LOT more of the fudge than you need, just so you know.) Don't try to use all the fudge. Just like Brylcreem, a little dab will do ya.

Peanut Butter & Fudge Oatmeal Cookies
from TheKitchn.com


4 dozen cookies
1/2 cup unsalted butter, very soft
1 1/2 cups creamy peanut butter
1 cup brown sugar
1/4 cup white sugar
3 eggs
2 teaspoons vanilla
4 1/2 cups old-fashioned oats
2 teaspoons baking soda
1/2 teaspoon salt
2 cups chocolate chips
One 14-ounce can sweetened condensed milk


Preheat oven to 350°F and line two large cookie sheets with parchment paper.

In a large bowl, mix the butter, peanut butter, and sugars. (You can use beaters, but it's easiest to just vigorously mix by hand.) (KATE'S NOTE: I am all for artisanal methods but the author of this recipe clearly needs to lay off the 'roids. Don't be hero: use a mixer, either hand or stand, to cream the sugars and butters. It does a better job of incorporating the butter.)  Mix in eggs and vanilla until thoroughly incorporated. Add the oats, baking soda, and salt, and mix thoroughly. Refrigerate the dough while preparing the fudge topping.

Mix the chocolate chips and sweetened condensed milk in a small saucepan. Warm over low heat, stirring frequently, until the chocolate is completely melted. Stir vigorously to make sure the mixture is evenly mixed. Turn off the burner under the chocolate.

In-process chocolate mixture. I never said these cookies were good for you.
Although the can of sweetened condensed milk does try to claim it is a good source of calcium.
 Remove the dough from the refrigerator and roll half of it into walnut-sized balls, pressing each one semi-flat on the cookie sheet. Top each ball of dough with a teaspoon of the warm chocolate mixture.

Bake the cookies for 10 minutes or until just golden around the edges. (Mine took twelve.) Remove from the oven and let cool on the sheets for a few minutes until they have firmed up enough to remove to wire racks. (You can remove the entire sheet of parchment paper and move the cookies to the rack in that way.)

Repeat with the remaining dough and fudge topping. (Warm and stir the chocolate over low heat if it has hardened too much to scoop.) Store the cooled cookies in an airtight container for up to 5 days.


Peanut butter and fudge. It's what's for dinner.


Monday, October 11, 2010

Noodling and Why I Save Ribbon

My cooking experience falls dramatically, woefully short when confronted by the many wonderful Asian cuisines. I have most of Europe down fairly well and can handle standard American fare, but pick a culture anywhere in Asia and odds are I have never even attempted to make even something simple from its rich culinary offerings. I don't think steaming a bag of frozen dumplings or boiling edamame counts as "cooking".

I am not normally the kind of person who tries out recipes in advance. I prefer to trust that whatever I make will be mostly edible and just go with it. Sometimes I'm wrong. But most of the time it all turns out fine. I do not believe in stressing out over cooking.

However, I had to take a different approach for the appetizer I made for the engagement party we threw for Christine and Kevin. We settled on a Chinese-Italian theme, with touches of Ohio, where they both grew up. I really wanted to make Chinese-inspired noodles and put them in Chinese takeout boxes, served with chopsticks. Having never made these before, I decided I would commit to them and then figure it out. Because cooking with these flavors is foreign to me (no pun intended), the week saw me testing several sesame noodle recipes, from here, here and here, in preparation for Saturday. In the end, I devised my own recipe, using bits of each, plus my own twist.

Kate's Sesame Noodles

Serves 6 as an appetizer or 4 as a meal

Ingredients
1 lb brown rice spaghetti or vermicelli (I think you can probably also use normal pasta but I didn't try that myself.)
2 tablespoons rice vinegar
2 tablespoons tahini (sesame) paste
3 tablespoons soy sauce
2 tablespoons toasted (dark) sesame oil, divided
1 garlic clove, minced
1 tablespoon honey
2 teaspoons sriracha sauce (I love how widely available this has become. Look at Target or World Market if it's not at your grocery store. You can also use chili-garlic sauce or a smaller quantity of chili oil, or even Tabasco.)
3 scallions, trimmed and very finely sliced to within
1 tablespoon toasted sesame seeds

Directions
1. Cook the noodles in a large pot of boiling, salted water. Stir them frequently for the first few minutes of cooking, otherwise they clump together. Cooking will probably take about 10 minutes. Test often after 8 minutes as you'll want to drain them while they are still toothsome but also fully cooked. (A little past al dente, whether you are using rice noodles or wheat noodles.)

2. While the noodles are boiling, whisk together all other ingredients except the scallions in a large bowl. 

3. Drain the noodles and rinse well under cold water. This is essential, so don't skip it. Otherwise the noodles are starchy and sticky and form a glutinous mass when combined with the sauce. Not good.

4. Dump the noodles into the sauce bowl. It's ok if they are a little wet. Toss the noodles with tongs so that the sauce gets fully distributed among them. All noodles should be completely coated.

5. Toss in most of the scallions (reserve a tablespoon or so) and re-toss with the tongs.

6. Serve in a bowl (or takeout container!) with chopsticks, sprinkling  the sesame seeds and some of the reserved scallions on top to garnish.

I am told that sticking the chopsticks in the food like this means "death" in Chinese culture.
Oops. So much for cultural sensitivity. I loved the presentation!

On a largely unrelated note, I thought it would be nice to have a rustic-elegant look for the food table so I got a bunch of sunflowers. I love fresh flowers. Always have. Always will. Any excuse to buy some flowers and I'm on it. Sunflowers I find somewhat challenging from a styling perspective because they are so stalky and top-heavy. I'm pretty pleased with my display solution here. The vase is actually a plastic pasta storage container, minus the lid. It's tall and sturdy enough to contain the sunflowers without tipping. 

My only challenge then was that the stalks were ugly. After brainstorming various solutions (sliced lemons, sliced limes, sliced oranges, berries, etc.) I decided I wanted something green (so as not to compete with the flower color) and something cheap that I could put in the vase to conceal them. Whole Foods presented me with some gigantic collard green leaves and a solution was born. I'm so pleased with the result, which was achieved by trimming and wrapping a single huge collard leaf around the stems, then putting the leaf-stem bundle in the vase and adding water. Keeping the ribbon super long lends a tiny bit of extravagance.

The ribbon, purchased at Perennials in Evanston, and previously worn as a dress sash at the Kellogg 2009 Charity Auction Ball ("A Black and White Gala"), is a leftover from my ribbon stash.

Never throw away good ribbon. It's a motto to live by.

I love how this looks with Blake and Britta's creamy yellowy dining room wall
and framed butterfly prints as a backdrop.


Sunday, October 10, 2010

My Favorite Breakfast

I've had strong opinions about things, both culinary and otherwise, from a very young age. For example, I absolutely refused to wear pants until I was in the second grade. To be clear, I was always wearing dresses and skirts, not going pants-less. I would also deign to wear shorts as long as they were not too boyish or sporty. Culottes were another acceptable option. But not pants. Never pants.

I also refused to eat peanut butter and jelly. I know. What kid doesn't eat PB&J? But I had lots of issues with it, structurally and otherwise. I loved to eat fresh fruit but hated the gooey, excessive sweetness of fruit concentrated into jam or jelly. It's also gross how the jelly always makes the one piece of bread soggy, and I honestly was never a rabid fan of peanut butter like other kids. Its heady scent was always a little much for me. But I am happy to report tha as I've aged, I've learned to appreciate salty-sweet combinations and finally had my first PB&J at age 30. Luckily this moment was recorded for posterity.


The other day I channeled the spirit of the good old PB&J and built what has become my new favorite breakfast: peanut butter (or almond butter) and fresh fruit on a rice cake. The fruit is interchangeable, but I've found that I prefer to use fruits which tend to make tasty jams - two favorite variations being figs and raspberries. This brand makes my favorite rice cakes (and that is certainly a statement I never thought I'd utter) because they are not too dense but still fresh and crunchy. It's worth picking up a sleeve if you can find them - they make an excellent base for all kinds of snacks and mini-meals.


I love love love figs.


Wednesday, October 06, 2010

Sponges and Beaches

It has been 50+ days without wheat (except for one small lapse at a wedding dessert buffet which only confirmed that wheat = bad for me.) It is starting to feel like forever. It's been remarkably easy - much easier than I would have initially thought - to cut out this entire category of foods.

The real problem with this allergy is that the 30 years of baking experience I have under my belt is basically now worthless. I have been turned upside down. I am beginning to understand why people my age who haven't grown up cooking alongside their parents, grandparents, etc are now completely daunted by cooking. Every recipe in my newly acquired Gluten Free Baking Classics book requires at least 3 kinds of flour, plus xanthan gum. And that's just for the basics. Don't even get me started on what's required if yeast is involved.

Incidentally, I feel that while on this topic a PSA is due: Don't spill xanthan gum on the counter. Or anywhere. That is easier said than done, as xanthan gum is highly powdery and just transferring it into a storage container almost ensures you will unleash a plume of white powder that evokes suspicious envelopes and ticking packages. Xanthan gum, required in small amounts in wheat-free items to provide structure that you normally get from gluten, becomes instantly, viciously viscous when put in contact with water, making it about as hard to clean up as egg white dropped on the floor. (And if you've never done that, trust me. Or try it.)

Completely overwhelmed, I bought a gluten-free flour blend at Whole Foods made by King Arthur that had approximately the same ingredients as GFBC says you should have in each recipe. This was my first mistake.
GFBC explicitly says that there is exactly ONE brand of flour that is acceptable because all other gluten-free flour blends lend themselves to gritty end products. However, this blend is unavailable in Northern California except for one little hippie co-op somewhere in Napa. Guess where I'm not driving to get some flour, for God's sake. Napa.

The bad news is that GFBC seems to be telling the truth, because the King Arthur didn't quite work as expected. Looks like I will be sucking it up and buying the super-refined brown rice flour online as instructed.

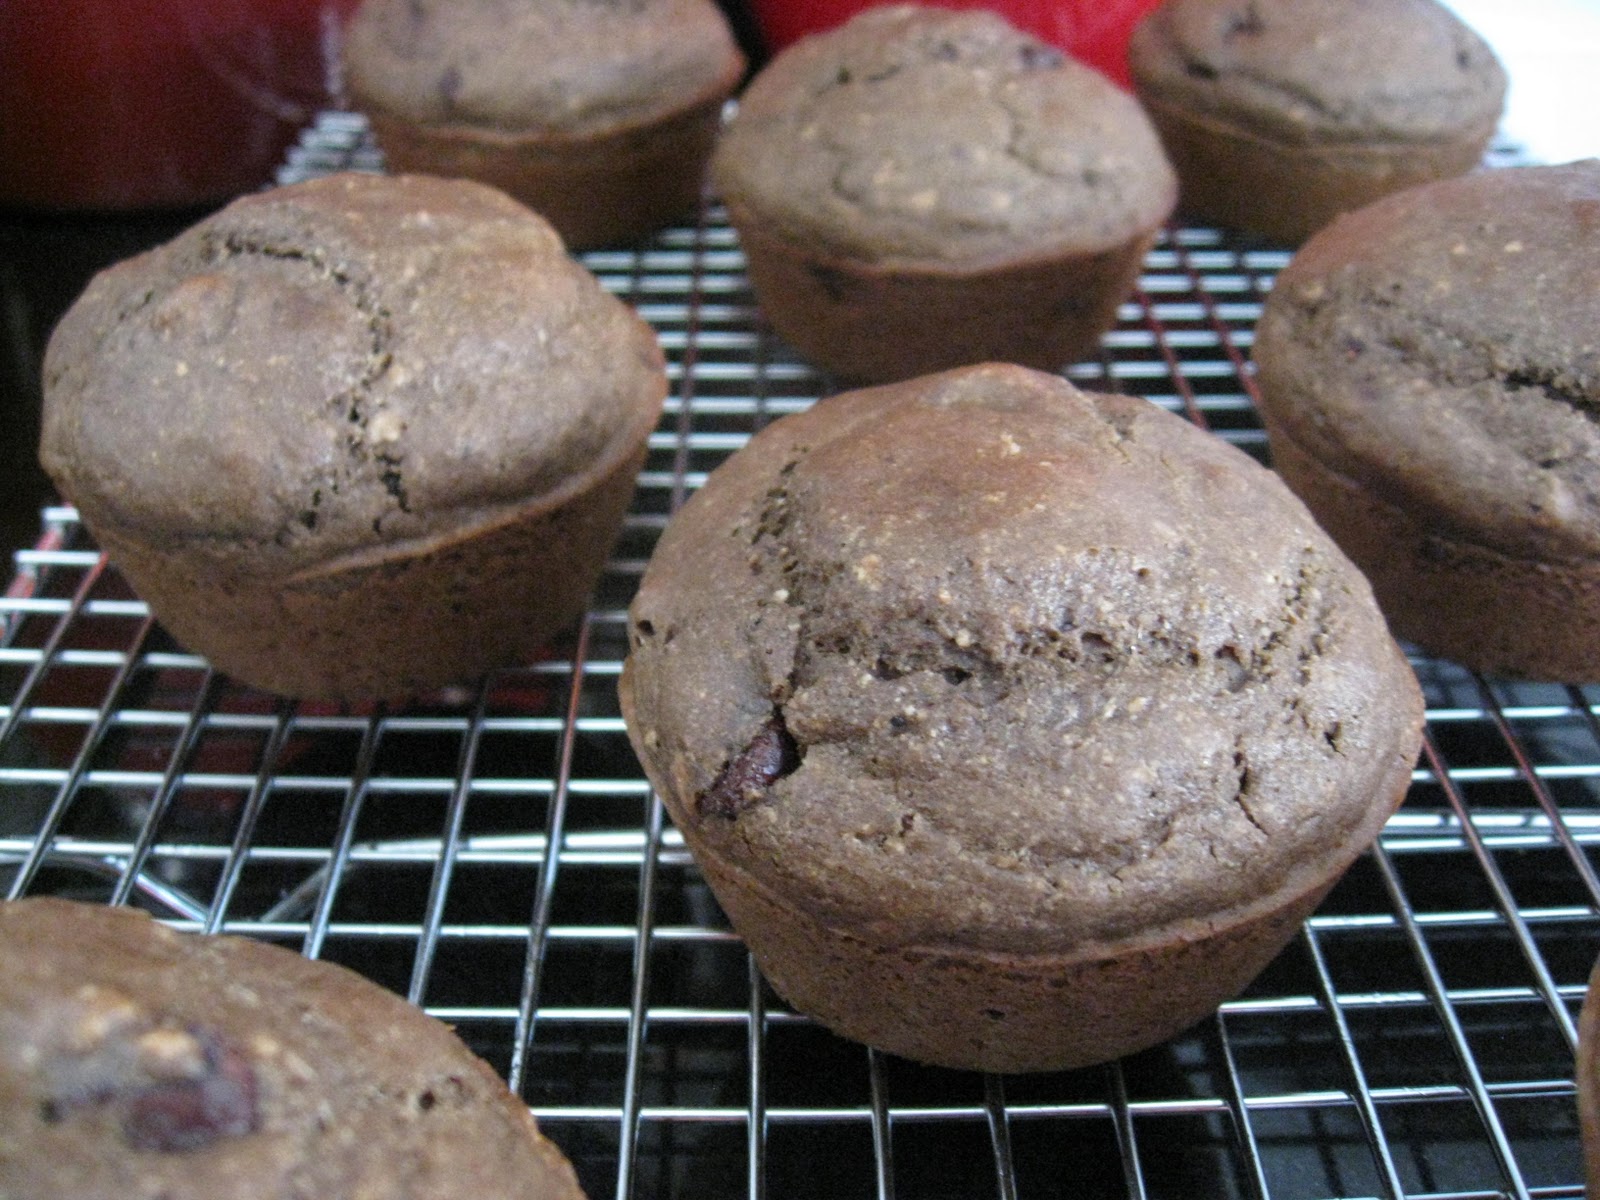
I decided to put this flour to the test with a GFBC recipe for Chocolate-Ricotta Muffins. I love chocolate and ricotta, so figured this was probably a good place to start.

In the end, the chocolate chips in this recipe are the primary redeemer. That, and heat. When these muffins are hot - ideally right out of the oven, but an oven reheating will also suffice, they are pretty tasty. When they are cold, well, let's just say I'd rather eat other things.

At least they look semi-normal. They were, admittedly, a bit spongy. Not in a sponge cake way. More like a Cell-O brand sponge way.


The second item, made simultaneously, was a fresh mozzarella and heirloom tomato tart modeled after this recipe on Epicurious. I had fantastic heirlooms and two giant bunches of basil from the farm box and all needed to be used up. Seemed like a perfect solution.

GFBC had a recipe for a tart crust. Only problem: the recipe was written for a sweet, not a savory, tart crust. I made a few substitutions (omitted the sugar, added parmesan and black pepper) and I thought I was in good shape. I par-baked the crust, and it came out looking normal, if a little crumbly.


Per the normal recipe instructions, I layered in the cheese, the homemade pesto, and the tomatoes. The tart looked beautiful.

The tomatoes from my farm box were just absolutely perfect.

It is at this point in the story that I am reminded of a moment from my childhoold. When I was three years old, in our Evanston townhouse, I used to paint watercolors with my stepdad. Not, mind you, with that strip of Crayola watercolors that you probably used at school. You know the ones - the "yellow" was never yellow, but usually some shade of hideous army green because of all the dumb kids who didn't clean their brushes well between colors, ruining the yellow for everyone. No, those were not real watercolors. We had actual art-store watercolor paper and the little tubes of pigment that you have to mix on a palette. Yes, I was three. I remember one particular painting I was really adding quite a lot of brushstrokes to and my dear stepdad observed that the difference between artists and non-artists is that "artists know when to stop." Truly, those are words I have remembered my entire life. They come back to me periodically at unusual times, like an old friend.

Unfortunately, they did not come back to me during the creation of this tart.
This is precisely the moment when the wheels came off.

I decided I wanted something pizza-y and threw the whole thing back in the oven to melt the cheese. The last-minute roasting at 425 had the unintended consequence of causing both the tomatoes and the cheese to give off all their liquid. Right into my lovely tart crust.

I brought the tart over to our usual Sunday football-watching venue (friends' house) and by the time I got there (one block away), it had given off at least a quarter-cup of liquid. Possibly a third. I actually had to drain it in the sink.
Surprisingly, it sliced nicely, but the crust was complete mush. The tomatoes and cheese and pesto were delicious and the crust tasted a little bit like what I imagine licking a Bermudan beach might be like. Only with better flavor. I will say this: the crust tasted good. But the gritty-pasty texture was really so terrible that you couldn't get past it.

I made an appointment with the allergist for Friday. Wondering if maybe I can get allergy shots for this wheat thing...

P.S. A special shout out to taste-testers Mer, Kevin, and Alex for sampling the above goods and not gagging. Audibly.


Monday, October 04, 2010

A Belated Labor Day Post

Remember Labor Day? Feels like years ago, doesn’t it?

This past Labor Day, we had quite the feast. That’s what happens when any one of my friends invites us all over for a “potluck.” There is always more food and drink to go around and we generally do a fairly good job polishing it all off. That’s just one reason why I love my friends so much.

I also love the idea of a feast. Harkening back to boyfriends of years past, one time I was on the hook for an Easter brunch because my boyfriend-at-the-time, B, and I both decided to spend our Easter locally rather than traveling home to either of our respective Catholic families. Not because we really wanted to celebrate Easter together but because we were too poor to afford plane tickets. Ah, the good old days.

Anyway, between the two of us, I was the cook (and the maid, and the personal assistant, and the book editor, and the laundrywoman, but I digress). I asked B what he wanted for Easter brunch since I thought it would be nice to include some of his family traditions as well as mine (smoked salmon on bagels, bunny biscotti). His response: “I want a FEAST.”

Well, B and I went our separate ways years ago, but the concept of a feast has suck with me. I love a feast. Feasts are hearty and celebratory. They make me think of meat on the bone, of things you eat with your hands, of abundance in every wonderful way.

My contributions to the semi-recent Labor Day Feast were thus: two kinds of kielbasa “bites” with spicy brown mustard (inspired by the MOST delicious appetizer at Holly and Scott's wedding in Pittsburgh) and these delicious figs. Hope you can enjoy them before figs leave us completely for the season.

Fresh Figs with Goat Cheese and Peppered Honey
This recipe is adapted from Bon Appetit.
 
Makes about 20 hors d'oeuvres
 
Ingredients
 
1/4 cup honey


3/4 teaspoon freshly ground black pepper
4 oz fresh goat cheese
1 tablespoon milk or cream
1 pint fresh figs, tiny stems trimmed, and cut into halves (or quarters, if really large). I prefer Calimyrna (aka Turkish or Green) figs for this recipe, but you can also use Mission or Brown Turkey figs
 
 Directions
 
1. Prepare the honey - combine the honey and black pepper in a small bowl or custard cup and let sit while you prepare the other ingredients.
2. In another small bowl, combine the goat cheese with the milk and blend/mash with a fork until smooth. (Alternatively, you can just use Chavrie goat cheese for this recipe and skip the milk.)
3. Spoon the cheese into a sandwich bag and snip off about 1/8 inch of one bottom corner of the bag. You should be able to pipe the cheese out the bag corner.
4. Lay the figs, cut side up, on a serving platter. Pipe a bit of cheese on top of each cut fig. You're going for a healthy dollop - slightly less than a tablespoon.
5. Once you have piped all the figs with cheese, use a spoon to drizzle the honey over the top of each fig. You should be able to see the honey on the cheese.
6. Serve immediately. This recipe does not keep, as the figs will begin to "weep" and make fig-puddles on the plate. That's just as well, as you will find these are hard to resist.
 

Festive flags optional.