Monday, December 20, 2010

Decking the Halls

I really love the Christmas season. I have several boxes of Christmas decor that I am just itching to open as soon as the sun sets on Thanksgiving.

About ten years ago, I started collecting Christmas ornaments every time I traveled somewhere new. I'm so glad I established this habit because when I hang them on the tree at the end of the year, I'm reminded of all the wonderful places I've been in the past year and years ago, and the stories behind each ornament. Here are a few of my favorites:
This is a 2010 contribution to the tree, thanks to Holly and Scott's wedding. I like that it looks kind of industrial. Fitting, no? This is actually a modified keychain that I picked up in the Pittsburgh airport Walgreens. Modified keychains frequently make great ornaments in a pinch.


In case you think your eyes are deceiving you, this is a beaver dressed as a Canadian Mountie, riding the requisite horse.  I picked it up in Nova Scotia on the Canada/New England cruise I was forced to go on for work several years back. At the time I was living in Boston, which we sailed right past. I waved to my apartment.  Why I couldn't have gotten the Alaska, Mediterranean, or Northern Europe assignments, I don't know.

The Harrods ornament was picked up the following year, while visiting Meredith during Law School "study" abroad. It is totally tacky flocked velvet and I love it.


This was another 2010 addition to the tree. Travel costs notwithstanding, this is the most expensive ornament on my tree. I'm not going to tell you how much it was, because that would be gauche. Ok, it was $20.  But it's made of flimsy tin, so $20 is a bit galling.


The most recent addition to my ornament collection was picked up just this month while visiting Avery Island, Louisiana, where TABASCO is made. This little pepper is apparently named "Tabascaux" and after I bought it, my boss pointed out that this pepper has a little pepper pecker poking out under its apron. Awkward. But since the pepper also has long eyelashes and a funny hat, I am beginning to think this is the Lady Gaga of Christmas ornaments.


My holiday spirit doesn't stop at the tree. I listen to holiday music in the car and at home from the day after Thanksgiving until Christmas Day. (The only device saved from this festive behavior is the shuffle I use at the gym. You try running on a treadmill to "I'm Dreaming of a White Christmas".) I never start playing the music before Thanksgiving and definitely never continue playing it after the 25th. Christmas music is delightful. In moderation. Like martinis.

I know this is true because when I was younger I worked Christmas-season retail (yes, at the MALL) and it is difficult to properly express the unspeakable horror of hearing "Santa Baby" nine times a day, every day, for ten weeks. It's enough to make anyone want to sharpen a candy cane to a fine point. And also because I know what it is like to have too many martinis.

This is one of my all-time favorite Christmas songs.


I mean, honestly. Thank you, Lou Monte, for singing this song about my people. (Really?? The reindeer - the flying reindeer - can't make it up the Italian hills? So we're subbing a donkey??) This song is just so ridiculous and I smile every time I hear it. A nice counterpoint to Handel's "Messiah," which I also like to include on the playlist.

Back to the decorating: I love the smell of pine in winter, so I have two wreaths up in addition to the tree. And just so we're clear, yes, it's a real tree. I just can't do the plastic kind. I know all kinds of people swear by them but I personally find them just a little bit soul-sucking. The trick to making the tree super glittery and wonderful is to string the lights both around the tree and run them in and out along the branches. Lights shoved toward the middle of the tree really help make it glow. Plan on 100ish lights per vertical foot. At least.


I love, love, love coming home to this door.
The wreath and big red bow feel so welcoming.


The aggressively-lit tree with (unwrapped) gifts under it.
I asked friends coming to my holiday party to bring over toys for the annual San Francisco Fire Department toy drive. This was not, as suggested by some, a ploy to meet firefighters. Although that is an excellent idea.  

Another wreath in the dining room.


I thought this guy needed a little festive attire.
This mask is probably a sacred African object, but what's Christmas without a little cultural insensitivity?


Cheap and easy, my favorite kind of decorating. You can pick up glass ornaments for just a few bucks at Target.  And who doesn't have a glass vase in the back of a cabinet or closet? So pretty. (For added sparkle, you can get a small strand of battery operated lights and intertwine them with the ornaments.)


I love poinsettias.  I thought this pink version was so cool and unusual.
And it looks great next to that stack of red Fiesta appetizer plates.


Another poinsettia by the door. I just removed that gross foil that these come wrapped in and dropped the plastic pot into a cute planter I already had.  I love the glittery reindeer, too.  His expression reminds me a little of Rocky (the family Lab.)


Last but not least.
Mistletoe is fun!
 Happy Holidays!


Sunday, December 19, 2010

No Onion, No Cry

Onions have plagued me since my very first kitchen experiences. I was always underfoot (and sometimes perched on a stepstool) in an effort to participate in kitchen affairs but things always ended in tears when an onion was involved.

My sensitivity was so bad that Mom would warn me when she was about to chop an onion and I would run in the Other Room and bury my head between the sofa cushions for as long as I could stand it. This room is known to normal families as the den or family room, but we've always called it "the Other Room" which gives you some indication of how much time my family spends in the kitchen.

The regular white onion is my nemesis, but I'll also shed tears over mild little scallions, garlic, and leeks. Even with a super-sharp knife, the mildest member of the Allium genus will open my lacrimal flood gates and burn my throat. And it's not easy to chop something with a super sharp knife when you can't see through a waterfall of tears. As a good friend once said, "I know how this story ends..."

Tonight's recipe required me to mince an onion, leading to red eyes and some serious tears rolling down my cheeks. What can I say? I'm a delicate flower.  I tried to photograph the effects but honestly, no one wants to see an extreme close up of my eye on this blog. Trust me.

I really need to pick up a pair of these. Plus, they are so stylish. I've always wanted to accessorize more like Spiderman.

This dip is modified from a Food and Wine recipe. Grace Parisi is one of the F&W test kitchen cooks, and her recipes are generally great. By which I mean, they are delicious and, importantly, they turn out as they should in my home kitchen. (Mark Bittman, take a note!)

Spicy Spinach Dip
adapted from Food and Wine (Grace Parisi), January 2005
Makes about 2 cups

INGREDIENTS

1 cup Greek-style plain nonfat yogurt
1 tablespoon extra-virgin olive oil
1/4 cup pine nuts
1/2 small yellow onion, minced
1/2 teaspoon ground cumin
1/2 teaspoon ground coriander
1/2 teaspoon pure chile powder
1/4 teaspoon cayenne
One 10-ounce package frozen whole-leaf spinach, thawed
Salt

DIRECTIONS

1. Scoop the yogurt into a paper towel-lined strainer set over a bowl. Let stand at room temperature for 30 minutes.

2. Meanwhile, heat the olive oil in a small skillet. Add the pine nuts and minced onion and cook over medium-high heat.


Feel the burn.


3. Stir frequently, until the onion is softened and lightly browned and the pine nuts are golden, 4 to 5 minutes. Add the cumin, coriander, chile powder and cayenne and cook, stirring, for 1 minute. Scrape into a bowl.

4. Using your hands or a clean dishtowel, squeeze the spinach until very dry, then coarsely chop it and discard any stringy pieces. Stir the spinach and yogurt into the onion mixture and season with salt.

You can serve this with crackers or bread or veggies. It's really delicious. I even ate some just straight with a fork, no dippers required. Although it doesn't photograph all that well, it is savory and complex and healthy. I love that.


NUTRITION INFORMATION
A new feature on this blog! I hope to be able to provide nutrition info for each recipe I post. Unless I am too lazy to type in the ingredients to build the label. Still, it's good to have aspirations.

Per half-cup serving:


Nutrition data provided by myfooddiary.com.

Tuesday, December 07, 2010

Je parle… Latin.

It is ongoing grist for the family mill that I was made to take Latin from the 6th grade through high school. This is because I had taken French from 1st through 6th grades in an after-school program, and I, like any good kid, bitched and moaned about having to take after-school French two days a week while other, normal kids were playing 8-bit Nintendo (yeah, I’m that old) and Sardines. Despite my complaining, Mme. McClamroch was convinced I had an ear for the language.


That ear was promptly stifled when Mom mandated in Caesar-like style that I take Latin for its vocabulary-building effects. Problem was, vocabulary-building not exactly my weakness. After all, we’re talking about a kid whose first word was “apple.” Why go with one syllable when you can start with two?

Despite a new level of bitching and moaning about Latin, (“But all my friends are taking French! But I already know some French! But I want to learn French!”) there have been a few incidents of Latin-usefulness throughout the years, and not just when reading building inscriptions while studying abroad in Italy. For example, in college, a reading for a history class discussed how an Iranian Ayatollah had met his death through defenestration and I knew that meant he’d been tossed out a window because in my freshman year of high school, I learned that “fenestra” is Latin for “window.” It was a small win for a dead language.

In the course of six and a half years of Latin study, we also got a fair dose of Roman history, as you might suspect. Such lessons included the founding story of the city, wherein the brothers Romulus and Remus suckled at the teat of the She-Wolf in order to gain strength and conquer lots of land and people. (I'm giving you the executive summary.) Wolf is lupus in Latin. Somehow, I never learned the word for “teat.”

There’s a famous bronze sculpture called "The Capitoline Wolf" depicting this event, which made its way into my Latin textbook.


I always found this image somewhat disturbing because of all those spiky teats. Like a porcupine gone wrong. Also, the dudes were nursing from this thing, as you can see. It all struck me as a rather unseemly start to the founding of this huge empire.

Imagine my surprise when I opened the farm box last Wednesday to see this:


I love to try new foods, and it's not often I come across a vegetable I've never seen before. I immediately began digging through the box to find the paper that tells me what they sent me and found an entire paragraph dedicated to describing this odd vegetable.

The Romesco, it says, is a variant of broccoli and can be cooked and eaten just like its more common cousin. Word on the street (farm?) is that it originated in 16th century Italy. While that would have been several thousand years after Romulus and Remus’ famed upbringing by Mama Wolf, I can’t help but wonder if maybe that statue (estimated to be from the 13th century) had something to do with the naming of this unusually spiky veggie.

I cooked up some Romesco tonight, steamed simply (so I could understand the true flavor) with a little freshly grated parmesan on top. It tastes kind of like a less-sweet cauliflower. Definitely better than wolf-milk. Or so I imagine.
 

Thursday, December 02, 2010

This is Genius.

I so have this problem. Nowhere to put clothes that are not fresh from the laundry/closet but also not dirty enough to go in the laundry basket.

I'd love to see two or three of these hung vertically up a wall. I might have to take this on. Except for the lack of a table saw...tricky....

Anyway, thank you again, genius editors at Apartment Therapy.


Monday, November 29, 2010

Mystery Solved

I have always thought it a bit odd that the gifts the Three Wise Men chose to bring baby Jesus were gold, frankincense, and myrrh.

Ok. Gold, I get. Always a good gift, gold. Perhaps not immediately useful for a baby, but at least it could be socked away for his college education or used for paying off Roman centurions or something.

But frankincense and myrrh? These do not sound like baby gifts. These sound like two weird uncles. ("Honey, Frankincense and Myrrh are coming over for Christmas dinner. Let's be sure we hide the booze before they get here.")

Turns out frankincense is an aromatic edible tree resin. Myrrh, on the other hand, is tree gum resin that was the principal ingredient in embalming mummies in Ancient Egypt. (Thank you, Wikipedia.)

Wise man gifts = gold, smelly maple syrup, and formaldehyde.
Good work, team.

Maybe next time Mary should consider registering at Babies R Us.

My skepticism of these "gifts" has existed for years. As someone who really loves shopping for gifts and loves even more to give a gift the recipient LOVES, I had decided maybe frankincense and myrrh are what happens when you let men, wise or otherwise, pick out baby gifts.

Then, a couple of weeks ago, I went to Blue Bottle Coffee to pick up some beans for a friend. On their menu was this sweet little loaf of Gingerbread "with frankincense and myrrh". (Why they elected to forgo the gold leaf flakes on top is beyond me, but, hey, I'm not in charge of their baked goods.) Obviously, I could not pass up this chance to experience two out of three Wise Man Gifts at once. Also, I really, really love gingerbread. And I hadn't eaten breakfast.


Clearly, I hated it.

Now I know why they call them the Wise Men.

Saturday, November 27, 2010

Autumn Harvest Party

Yes, I am way behind on posts. It's been a busy Fall.

Back in October (I know, I know) Meredith got her shipment of fabulous wines and cheeses from Williamson Wines. I had finally gotten the furniture in my apartment rearranged and sorted out (more on this later, I swear) and was ready to host a party after a 10-month rearrangement and home improvement hiatus.

In case I haven't mentioned it 1000 times already, I just absolutely love the produce available in the Bay Area. Here's a shot of the bounty that accompanied the cheeses.


I just love these colors.

For this party, I also made the cake referenced in this previous post. Per Molly Wizenberg's perfect instructions, I made the cake several days in advance of the party, freezed it, and then thawed it. It is so rich that I also ate a tiny sliver of it for dinner (alongside either a veggie or some fruit) for the rest of the week after the party. So, so, so good. There is a reason she calls it the "Winning Hearts and Minds Cake." Only read the recipe if you are not afraid of cholesterol. This cake is good for you only in spirit.


I think my preferred way to eat this cake is cold, straight from the fridge. Blake suggested (and I agree) that it is perfectly accompanied by a cold glass of milk. Yum.

Once I get started thinking about making things, it's hard for me to stop. In addition to a bunch of other things, I cooked up a Tomato Jam, which took advantage of some of the last heirloom tomatoes of the season. I put it in a cleaned out Bonne Maman apricot preserves jar - so cute.


The simplicity of this recipe belies how great it is.
It's awesome with cheese.

Of course, because I love love love savory ingredients in sweet applications, I also made the corresponding Rosemary Cookies in the jam's sister recipe. They were really delicious and I am considering reprising them in this year's Christmas cookie spread.

I also made mini pumpkin pies because I love any and all bite-sized foods. I would eat hors d'oeuvres exclusively if it were possible/reasonable. I have always loved small bites and no doubt always will.

These mini pies couldn't be easier. With everything else on my list, I elected to buy Pillsbury Pie Dough from the refrigerated section of the supermarket rather than make it from scratch. I will admit, I died a small death in doing this. There are definitely weirdo ingredients in the dough that make it so perfectly easy to roll out without sticking. I might be imagining it, but I felt like I could taste the chemicals just a smidge. So next time I will plan ahead and make my own dough. But if you can look past feeding your friends and loved ones "Partially Hydrogenated Lard with BHA and BHT Added to Protect Flavor" and "Potassium Sorbate and Sodium Propionate," this is a super easy and fast recipe. The filling is straight off the back of the Libby's can, no changes or substitutions.

I rolled out the dough so it was a bit thinner than normal (maybe 1/16"?) because these pies were going to be so small. I used a scotch glass to cut out the crusts (it was the perfect diameter to fit my mini muffin tins) but you could also use a biscuit cutter if you own one, which I do not.

Once they were filled and baked (18ish minutes later), my finishing touch was to add just a bit of finely chopped crystallized ginger on top, which really just makes these a teeny bit more special.


Happy Autumn and a belated Happy Thanksgiving to everyone!


Tuesday, November 02, 2010

Ow.

I just burned my mouth on this:


It was worth it. This is my "made up" pizza recipe, heavily borrowed from Croma restaurant in Boston. I used to order their Pizza Fiorentina all the time and loved it.

Here's how to make it.  I like to call my version Pizza Signorina. You'll see why in a bit.

Kate's Pizza Signorina
Ingredients

Crust:
A softball-sized ball of pre-made fresh pizza dough. Please, not that processed crap in a can. You can usually find the good fresh stuff in the refrigerated section at Whole Foods or near the deli/bakery section at other grocery stores. Sometimes you can find it in the freezer section, in which case you just need to plan ahead. Or go nuts and make your own from scratch.
High heat cooking spray (canola is good for this)
A small handful of cornmeal

Sauce:
A small can of tomato sauce (Not pizza sauce. Season this yourself!)
1 tablespoon dried oregano, basil, "Italian Seasoning" or any combination thereof
1 large clove garlic, pressed
1 teaspoon kosher salt
1/2 teaspoon (or more) freshly ground pepper

Toppings:
3 or so ounces of raw baby spinach
Olive oil, salt and freshly ground pepper
1 ball fresh mozzarella, sliced very thinly
8 or so oil-cured black olives, halved and pitted (don't sub brine-cured olives like kalamata, they are too acidic and it tastes BAD)
2 whole eggs

Directions:
Preheat your oven to 450 degrees.

Prep your pan: Spray a large cookie sheet with the cooking spray and sprinkly the cornmeal over it. You just want a dusting of it.

Stretch the dough between your hands, without ripping it, until it roughly resembles the shape of your cookie sheet (just slightly smaller). It doesn't have to be perfect. Try to leave a little rim around the edge of the dough that's thicker than the middle. The middle should be fairly evenly thin.

Place it over the sheet and stretch it as needed. Let it be for a minute.

Prep your sauce: combine the sauce ingredients in a small bowl and stir to combine. Spread about half the sauce on the dough, leaving about 3/4 inch around the edges of the dough. You should have only a thin coating of sauce, and you should be able to see the dough through the sauce. This is not a super saucy Domino's-style pizza. Reserve remaining sauce for another pizza (you can freeze it in a baggie if you want.)

Drizzle the baby spinach with a tablespoon or so of olive oil, and season with salt and pepper. Toss to coat/combine. Layer the spinach on top of the sauce, then the cheese, then the olives. Put it in the HOT oven for 10 minutes.

It will look something like this when the timer goes off:


Be careful taking it out of the oven as it may be a bit "juicy" at this point. Now, crack the two eggs on top of the pizza. (This is where it gets its name. It's like the Italian Croque Madame. You know, because it looks like boobs with the two yolks on top. Sort of.) Put it back in the oven for another 10 minutes.

At this point, it should look like this, or slightly neater if one of your yolks didn't bust like mine did.


Slide it off the sheet onto a cutting board, and (here's where I don't follow my own instructions) wait five minutes before cutting and eating. Hopefully you won't burn your mouth, but even if you do, it will be worth it. The eggs should be just barely runny and add this incredible creaminess to the pizza. I love it.

This pizza is especially great served with a little bit of red pepper flakes and some red wine. Mangia.

Tuesday, October 19, 2010

This is What Delicious Looks Like


Try not to drool on your keyboard.

Consider this a sneak preview of a post to come. Until then, I'll be in NY for a few days and, when back, putting the finishing touches on the VERY exciting furniture rearrangement that took place last weekend. Things got turned upside down (in a good way) and I am so very pleased with the results. MAJOR thanks to Blake and Jeff for helping me move things. I promise a "house" photo tour is in the works. Soon.

Friday, October 15, 2010

Martha Martha Martha

I Tivo the Martha Stewart Show on the Hallmark Channel. Mock me if you want. I don't care. I like good things.

She made these with the pastry chef from the Four Seasons Restaurant. I'm obsessed.

The options for filling these things are basically endless.
This has Thanksgiving written all over it.


picture from marthastewart.com


Thursday, October 14, 2010

A "Petit" Déjeuner in the Very Literal Sense

It is a fairly well established fact that the French do not screw around when it comes to food. I can hardly blame them. If I had my own country, it also would probably have lots of good food and lots of vacation days. It's not a bad way to be. If you ignore all the other social, political, and economic issues, of course.

One of the things I love most about French food is how it repeatedly and excellently elevates the humble to the sublime. Is there anything better than sitting outside a cafe on a sunny day with a fresh crusty baguette smeared with a dab of ripe, semi-stinky cheese, accompanied by a glass of chilled rosé and some delightful company? I think not.

I am not entirely sure where I heard about the classically French combination of radishes with sea salt and butter but I am a convert. It's not so much a recipe as an assemblage of four simple components: radishes, thinly sliced - it helps to have a mandoline for this and if you do, set it to 1/8"; baguette, also sliced; softened (but not melted) butter, ideally President if you really want to be authentic but good unsalted American butter will do; and fleur de sel, the kind of sea salt you can crunch up between your fingers. I like Maldon.


I can't eat a radish without thinking of Nana, who always, ALWAYS, had them thinly sliced in the green salad she served alongside dinner. I have always loved the freshness and crunch of radishes although I will say this recipe works slightly better with the milder spring radishes than the heartier fall ones. The fall ones have a bit more bite. Nevertheless, if you like radishes, you can solve this seasonal issue with just a tad more butter and salt.

Assembly of this little lunch treat is as follows:

1. Spread baguette slice with butter. You want it to be visible on the bread like a spread, not scraped into the crumb. But not too generous with the butter or it'll kill the flavor of everything else.

2. Sprinkle fleur de sel over the butter, crunching up the little salt pyramid-flakes into smaller bits. If you don't know what I am talking about you are not using the right salt. You can certainly try this with kosher salt or sea salt ground from a salt grinder but I can't promise it will taste as it should. Please do not use normal iodized salt. In a dish with so few ingredients, the quality of each matters that much more, so I am going to be unapologetically snobbish about this salt thing.

3. Layer the radishes on top. Just one layer is fine, with a little overlap. Press them gently into the butter.

4. Take a bite. If the flavors do not wow you, try a little more salt on the next one. You'll know when you have the right proportions because it will be delicious. It's an art, not a science.


 A perfect little Saturday lunch.


Tuesday, October 12, 2010

One Benefit of Adulthood

Is that you can eat what you want, when you want. Tonight for dinner I had cookies. Yes, for dinner. I know it was dinner because the cookies were accompanied by a glass of wine. And I was seated. Food + wine + a seat = dinner.

It was just one of those days. And I wanted to cook. Luckily, God presented me with the most painfully boring conference call I've been on in...oh...years. (Thanks, buddy!) I therefore had plenty of time to read my RSS feeds. One of these is The Kitchn via Apartment Therapy, which usually overwhelms me because at any one time there are 60+ new posts in the feed list. Information overload for sure.

However, today, I had nothing but time, sweet time. And I ran across this. Can you say yum?
I thought you could.

Having been burned before, I called Whole Foods in advance to confirm that they did actually stock sweetened condensed milk. Despite not having marshmallows, they do apparently carry preserved sugar-milk in a can and acted like I was an idiot for asking. Whatever, Whole Foods.

Here's the recipe. It does indeed make 4 dozen. Unless you eat 3 cookies' worth of dough. And then it makes 45. (It does, however, make a LOT more of the fudge than you need, just so you know.) Don't try to use all the fudge. Just like Brylcreem, a little dab will do ya.

Peanut Butter & Fudge Oatmeal Cookies
from TheKitchn.com


4 dozen cookies
1/2 cup unsalted butter, very soft
1 1/2 cups creamy peanut butter
1 cup brown sugar
1/4 cup white sugar
3 eggs
2 teaspoons vanilla
4 1/2 cups old-fashioned oats
2 teaspoons baking soda
1/2 teaspoon salt
2 cups chocolate chips
One 14-ounce can sweetened condensed milk


Preheat oven to 350°F and line two large cookie sheets with parchment paper.

In a large bowl, mix the butter, peanut butter, and sugars. (You can use beaters, but it's easiest to just vigorously mix by hand.) (KATE'S NOTE: I am all for artisanal methods but the author of this recipe clearly needs to lay off the 'roids. Don't be hero: use a mixer, either hand or stand, to cream the sugars and butters. It does a better job of incorporating the butter.)  Mix in eggs and vanilla until thoroughly incorporated. Add the oats, baking soda, and salt, and mix thoroughly. Refrigerate the dough while preparing the fudge topping.

Mix the chocolate chips and sweetened condensed milk in a small saucepan. Warm over low heat, stirring frequently, until the chocolate is completely melted. Stir vigorously to make sure the mixture is evenly mixed. Turn off the burner under the chocolate.

In-process chocolate mixture. I never said these cookies were good for you.
Although the can of sweetened condensed milk does try to claim it is a good source of calcium.
 Remove the dough from the refrigerator and roll half of it into walnut-sized balls, pressing each one semi-flat on the cookie sheet. Top each ball of dough with a teaspoon of the warm chocolate mixture.

Bake the cookies for 10 minutes or until just golden around the edges. (Mine took twelve.) Remove from the oven and let cool on the sheets for a few minutes until they have firmed up enough to remove to wire racks. (You can remove the entire sheet of parchment paper and move the cookies to the rack in that way.)

Repeat with the remaining dough and fudge topping. (Warm and stir the chocolate over low heat if it has hardened too much to scoop.) Store the cooled cookies in an airtight container for up to 5 days.


Peanut butter and fudge. It's what's for dinner.


Monday, October 11, 2010

Noodling and Why I Save Ribbon

My cooking experience falls dramatically, woefully short when confronted by the many wonderful Asian cuisines. I have most of Europe down fairly well and can handle standard American fare, but pick a culture anywhere in Asia and odds are I have never even attempted to make even something simple from its rich culinary offerings. I don't think steaming a bag of frozen dumplings or boiling edamame counts as "cooking".

I am not normally the kind of person who tries out recipes in advance. I prefer to trust that whatever I make will be mostly edible and just go with it. Sometimes I'm wrong. But most of the time it all turns out fine. I do not believe in stressing out over cooking.

However, I had to take a different approach for the appetizer I made for the engagement party we threw for Christine and Kevin. We settled on a Chinese-Italian theme, with touches of Ohio, where they both grew up. I really wanted to make Chinese-inspired noodles and put them in Chinese takeout boxes, served with chopsticks. Having never made these before, I decided I would commit to them and then figure it out. Because cooking with these flavors is foreign to me (no pun intended), the week saw me testing several sesame noodle recipes, from here, here and here, in preparation for Saturday. In the end, I devised my own recipe, using bits of each, plus my own twist.

Kate's Sesame Noodles

Serves 6 as an appetizer or 4 as a meal

Ingredients
1 lb brown rice spaghetti or vermicelli (I think you can probably also use normal pasta but I didn't try that myself.)
2 tablespoons rice vinegar
2 tablespoons tahini (sesame) paste
3 tablespoons soy sauce
2 tablespoons toasted (dark) sesame oil, divided
1 garlic clove, minced
1 tablespoon honey
2 teaspoons sriracha sauce (I love how widely available this has become. Look at Target or World Market if it's not at your grocery store. You can also use chili-garlic sauce or a smaller quantity of chili oil, or even Tabasco.)
3 scallions, trimmed and very finely sliced to within
1 tablespoon toasted sesame seeds

Directions
1. Cook the noodles in a large pot of boiling, salted water. Stir them frequently for the first few minutes of cooking, otherwise they clump together. Cooking will probably take about 10 minutes. Test often after 8 minutes as you'll want to drain them while they are still toothsome but also fully cooked. (A little past al dente, whether you are using rice noodles or wheat noodles.)

2. While the noodles are boiling, whisk together all other ingredients except the scallions in a large bowl. 

3. Drain the noodles and rinse well under cold water. This is essential, so don't skip it. Otherwise the noodles are starchy and sticky and form a glutinous mass when combined with the sauce. Not good.

4. Dump the noodles into the sauce bowl. It's ok if they are a little wet. Toss the noodles with tongs so that the sauce gets fully distributed among them. All noodles should be completely coated.

5. Toss in most of the scallions (reserve a tablespoon or so) and re-toss with the tongs.

6. Serve in a bowl (or takeout container!) with chopsticks, sprinkling  the sesame seeds and some of the reserved scallions on top to garnish.

I am told that sticking the chopsticks in the food like this means "death" in Chinese culture.
Oops. So much for cultural sensitivity. I loved the presentation!

On a largely unrelated note, I thought it would be nice to have a rustic-elegant look for the food table so I got a bunch of sunflowers. I love fresh flowers. Always have. Always will. Any excuse to buy some flowers and I'm on it. Sunflowers I find somewhat challenging from a styling perspective because they are so stalky and top-heavy. I'm pretty pleased with my display solution here. The vase is actually a plastic pasta storage container, minus the lid. It's tall and sturdy enough to contain the sunflowers without tipping. 

My only challenge then was that the stalks were ugly. After brainstorming various solutions (sliced lemons, sliced limes, sliced oranges, berries, etc.) I decided I wanted something green (so as not to compete with the flower color) and something cheap that I could put in the vase to conceal them. Whole Foods presented me with some gigantic collard green leaves and a solution was born. I'm so pleased with the result, which was achieved by trimming and wrapping a single huge collard leaf around the stems, then putting the leaf-stem bundle in the vase and adding water. Keeping the ribbon super long lends a tiny bit of extravagance.

The ribbon, purchased at Perennials in Evanston, and previously worn as a dress sash at the Kellogg 2009 Charity Auction Ball ("A Black and White Gala"), is a leftover from my ribbon stash.

Never throw away good ribbon. It's a motto to live by.

I love how this looks with Blake and Britta's creamy yellowy dining room wall
and framed butterfly prints as a backdrop.


Sunday, October 10, 2010

My Favorite Breakfast

I've had strong opinions about things, both culinary and otherwise, from a very young age. For example, I absolutely refused to wear pants until I was in the second grade. To be clear, I was always wearing dresses and skirts, not going pants-less. I would also deign to wear shorts as long as they were not too boyish or sporty. Culottes were another acceptable option. But not pants. Never pants.

I also refused to eat peanut butter and jelly. I know. What kid doesn't eat PB&J? But I had lots of issues with it, structurally and otherwise. I loved to eat fresh fruit but hated the gooey, excessive sweetness of fruit concentrated into jam or jelly. It's also gross how the jelly always makes the one piece of bread soggy, and I honestly was never a rabid fan of peanut butter like other kids. Its heady scent was always a little much for me. But I am happy to report tha as I've aged, I've learned to appreciate salty-sweet combinations and finally had my first PB&J at age 30. Luckily this moment was recorded for posterity.


The other day I channeled the spirit of the good old PB&J and built what has become my new favorite breakfast: peanut butter (or almond butter) and fresh fruit on a rice cake. The fruit is interchangeable, but I've found that I prefer to use fruits which tend to make tasty jams - two favorite variations being figs and raspberries. This brand makes my favorite rice cakes (and that is certainly a statement I never thought I'd utter) because they are not too dense but still fresh and crunchy. It's worth picking up a sleeve if you can find them - they make an excellent base for all kinds of snacks and mini-meals.


I love love love figs.


Wednesday, October 06, 2010

Sponges and Beaches

It has been 50+ days without wheat (except for one small lapse at a wedding dessert buffet which only confirmed that wheat = bad for me.) It is starting to feel like forever. It's been remarkably easy - much easier than I would have initially thought - to cut out this entire category of foods.

The real problem with this allergy is that the 30 years of baking experience I have under my belt is basically now worthless. I have been turned upside down. I am beginning to understand why people my age who haven't grown up cooking alongside their parents, grandparents, etc are now completely daunted by cooking. Every recipe in my newly acquired Gluten Free Baking Classics book requires at least 3 kinds of flour, plus xanthan gum. And that's just for the basics. Don't even get me started on what's required if yeast is involved.

Incidentally, I feel that while on this topic a PSA is due: Don't spill xanthan gum on the counter. Or anywhere. That is easier said than done, as xanthan gum is highly powdery and just transferring it into a storage container almost ensures you will unleash a plume of white powder that evokes suspicious envelopes and ticking packages. Xanthan gum, required in small amounts in wheat-free items to provide structure that you normally get from gluten, becomes instantly, viciously viscous when put in contact with water, making it about as hard to clean up as egg white dropped on the floor. (And if you've never done that, trust me. Or try it.)

Completely overwhelmed, I bought a gluten-free flour blend at Whole Foods made by King Arthur that had approximately the same ingredients as GFBC says you should have in each recipe. This was my first mistake.
GFBC explicitly says that there is exactly ONE brand of flour that is acceptable because all other gluten-free flour blends lend themselves to gritty end products. However, this blend is unavailable in Northern California except for one little hippie co-op somewhere in Napa. Guess where I'm not driving to get some flour, for God's sake. Napa.

The bad news is that GFBC seems to be telling the truth, because the King Arthur didn't quite work as expected. Looks like I will be sucking it up and buying the super-refined brown rice flour online as instructed.

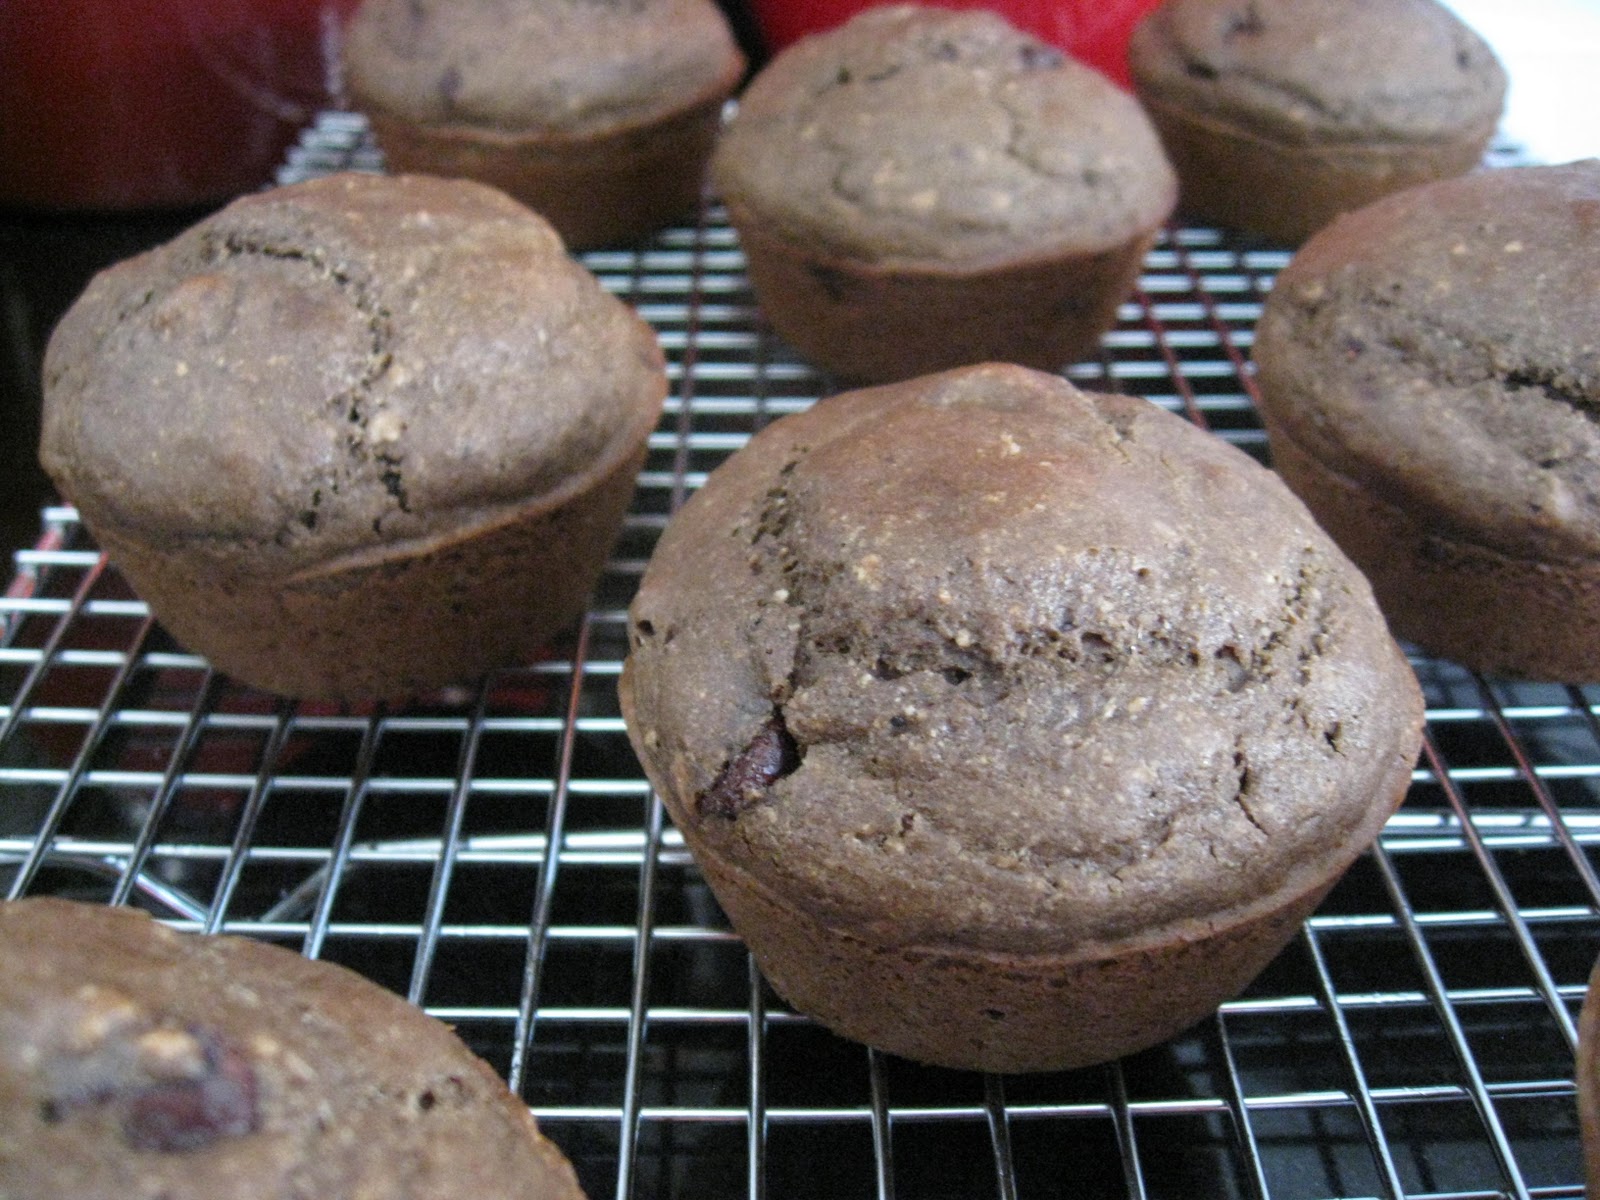
I decided to put this flour to the test with a GFBC recipe for Chocolate-Ricotta Muffins. I love chocolate and ricotta, so figured this was probably a good place to start.

In the end, the chocolate chips in this recipe are the primary redeemer. That, and heat. When these muffins are hot - ideally right out of the oven, but an oven reheating will also suffice, they are pretty tasty. When they are cold, well, let's just say I'd rather eat other things.

At least they look semi-normal. They were, admittedly, a bit spongy. Not in a sponge cake way. More like a Cell-O brand sponge way.


The second item, made simultaneously, was a fresh mozzarella and heirloom tomato tart modeled after this recipe on Epicurious. I had fantastic heirlooms and two giant bunches of basil from the farm box and all needed to be used up. Seemed like a perfect solution.

GFBC had a recipe for a tart crust. Only problem: the recipe was written for a sweet, not a savory, tart crust. I made a few substitutions (omitted the sugar, added parmesan and black pepper) and I thought I was in good shape. I par-baked the crust, and it came out looking normal, if a little crumbly.


Per the normal recipe instructions, I layered in the cheese, the homemade pesto, and the tomatoes. The tart looked beautiful.

The tomatoes from my farm box were just absolutely perfect.

It is at this point in the story that I am reminded of a moment from my childhoold. When I was three years old, in our Evanston townhouse, I used to paint watercolors with my stepdad. Not, mind you, with that strip of Crayola watercolors that you probably used at school. You know the ones - the "yellow" was never yellow, but usually some shade of hideous army green because of all the dumb kids who didn't clean their brushes well between colors, ruining the yellow for everyone. No, those were not real watercolors. We had actual art-store watercolor paper and the little tubes of pigment that you have to mix on a palette. Yes, I was three. I remember one particular painting I was really adding quite a lot of brushstrokes to and my dear stepdad observed that the difference between artists and non-artists is that "artists know when to stop." Truly, those are words I have remembered my entire life. They come back to me periodically at unusual times, like an old friend.

Unfortunately, they did not come back to me during the creation of this tart.
This is precisely the moment when the wheels came off.

I decided I wanted something pizza-y and threw the whole thing back in the oven to melt the cheese. The last-minute roasting at 425 had the unintended consequence of causing both the tomatoes and the cheese to give off all their liquid. Right into my lovely tart crust.

I brought the tart over to our usual Sunday football-watching venue (friends' house) and by the time I got there (one block away), it had given off at least a quarter-cup of liquid. Possibly a third. I actually had to drain it in the sink.
Surprisingly, it sliced nicely, but the crust was complete mush. The tomatoes and cheese and pesto were delicious and the crust tasted a little bit like what I imagine licking a Bermudan beach might be like. Only with better flavor. I will say this: the crust tasted good. But the gritty-pasty texture was really so terrible that you couldn't get past it.

I made an appointment with the allergist for Friday. Wondering if maybe I can get allergy shots for this wheat thing...

P.S. A special shout out to taste-testers Mer, Kevin, and Alex for sampling the above goods and not gagging. Audibly.


Monday, October 04, 2010

A Belated Labor Day Post

Remember Labor Day? Feels like years ago, doesn’t it?

This past Labor Day, we had quite the feast. That’s what happens when any one of my friends invites us all over for a “potluck.” There is always more food and drink to go around and we generally do a fairly good job polishing it all off. That’s just one reason why I love my friends so much.

I also love the idea of a feast. Harkening back to boyfriends of years past, one time I was on the hook for an Easter brunch because my boyfriend-at-the-time, B, and I both decided to spend our Easter locally rather than traveling home to either of our respective Catholic families. Not because we really wanted to celebrate Easter together but because we were too poor to afford plane tickets. Ah, the good old days.

Anyway, between the two of us, I was the cook (and the maid, and the personal assistant, and the book editor, and the laundrywoman, but I digress). I asked B what he wanted for Easter brunch since I thought it would be nice to include some of his family traditions as well as mine (smoked salmon on bagels, bunny biscotti). His response: “I want a FEAST.”

Well, B and I went our separate ways years ago, but the concept of a feast has suck with me. I love a feast. Feasts are hearty and celebratory. They make me think of meat on the bone, of things you eat with your hands, of abundance in every wonderful way.

My contributions to the semi-recent Labor Day Feast were thus: two kinds of kielbasa “bites” with spicy brown mustard (inspired by the MOST delicious appetizer at Holly and Scott's wedding in Pittsburgh) and these delicious figs. Hope you can enjoy them before figs leave us completely for the season.

Fresh Figs with Goat Cheese and Peppered Honey
This recipe is adapted from Bon Appetit.
 
Makes about 20 hors d'oeuvres
 
Ingredients
 
1/4 cup honey


3/4 teaspoon freshly ground black pepper
4 oz fresh goat cheese
1 tablespoon milk or cream
1 pint fresh figs, tiny stems trimmed, and cut into halves (or quarters, if really large). I prefer Calimyrna (aka Turkish or Green) figs for this recipe, but you can also use Mission or Brown Turkey figs
 
 Directions
 
1. Prepare the honey - combine the honey and black pepper in a small bowl or custard cup and let sit while you prepare the other ingredients.
2. In another small bowl, combine the goat cheese with the milk and blend/mash with a fork until smooth. (Alternatively, you can just use Chavrie goat cheese for this recipe and skip the milk.)
3. Spoon the cheese into a sandwich bag and snip off about 1/8 inch of one bottom corner of the bag. You should be able to pipe the cheese out the bag corner.
4. Lay the figs, cut side up, on a serving platter. Pipe a bit of cheese on top of each cut fig. You're going for a healthy dollop - slightly less than a tablespoon.
5. Once you have piped all the figs with cheese, use a spoon to drizzle the honey over the top of each fig. You should be able to see the honey on the cheese.
6. Serve immediately. This recipe does not keep, as the figs will begin to "weep" and make fig-puddles on the plate. That's just as well, as you will find these are hard to resist.
 

Festive flags optional.

Monday, September 27, 2010

Hot! Too Hot!

It's hot here in San Francisco today. Really, legitimately, hot. Wish-I-had-air-conditioning-at-home-and-at-work hot. Dark-Helmet-drinking-coffee hot.

Hot enough, really, that all I want to eat is cold food. It is in this sweaty spirit that I share with you one of my favorite no-cook recipes.

Kate's Provencal Tuna Salad

Serves 1
Prep Time: 10 minutes unless your knives are dull

Ingredients
1 3 oz. pouch of chunk light tuna PLUS 1 teaspoon extra virgin olive oil OR 1 can of really good tuna packed in olive oil, drained well and blotted with paper towels
zest of 1/4 lemon (about a teaspoon or two) (see notes)
1 tablespoon capers, drained
1/3-1/2 cup ripe tomato, chopped (see notes)
1/4 cup coarsely chopped flat leaf parsley
6-8 oil cured black olives, pitted and coarsely chopped  (see notes)
Salt and freshly ground pepper

Directions
Flake the tuna into a bowl, adding the olive oil if not oil-packed. Add everything else except the salt and pepper and mix with a fork. Add salt and pepper to taste - you will mostly likely want at least 1/4 teaspoon of each to make the flavor really come out. Let sit for 5-10 minutes, either in the fridge or on the counter, to help the flavors blend.

Notes:
Lemon zest - Do yourself a favor and buy a microplane grater. If you don't have one, use a paring knife to peel off the zest, then slice it into strips and chop it very finely.
Tomatoes- Any variety will do, but if they are not in season, use grape tomatoes
Olives - You can sub kalamatas in this if you are a pansy, but I strongly prefer the punch the oil-cured olives add to the mix

Serve any of the following ways:
Salad: Put in a bowl. Eat with a fork.
Sandwich: This is great on toasted multi-grain bread or stuffed in a warmed whole wheat pita pocket
Peasant-style: Add some boiled, chilled, coarsely chopped red or fingerling potatoes (you'll also need to add a bit more olive oil and salt)
Fancy: Lop the top off a fist-sized tomato, hollow it out and stuff it with this. Stick a parsley sprig in the top.


Sunday, September 26, 2010

A Hook Problem

Almost exactly nine years ago, my dear dad and I drove the long, flat, boring road from Chicago to Austin in my move to Texas. Of course, once we got to Austin and unpacked Vinny (my car), we made a trip to The Container Store, or, as Dad likes to refer to it, Anal-Retentive Heaven.

As anyone who has moved all of their wordly belongings out of state knows, moves are hard. They're stressful.

In the midst of such stress (mostly on my part), we found ourselves wandering the aisles of The Container Store at the Austin Arboretum. As lost people are wont to do, we were going up and down every aisle in the store to make sure we weren't forgetting anything. I don't know how familiar you are with The Container Store but their employees are aggressively friendly. This one saleswoman, who looked a little too much like the cartoon Cathy come to life, just would not take a hint and leave us alone. She must have asked us if we needed help, oh, 4 or 5 times. In the span of 20 minutes. We didn't need help the first time she asked and we didn't need help the fifth.

As we meandered down the hook aisle, Cathy pounced once again.

"Can I help you with a hook problem?"

It was all we could do not to laugh in her face. A hook problem? How do you have a hook problem?
Like this?

Which brings us to today.

In the move to reorganize and clean out my apartment and make better use of my "storage room," I am now trying to be super-efficient with my closet space across the board. Sadly, my dining table leaf has been left without a home in the new storage room layout. It has taken up residence in the hallway - obviously not a long-term solution. I was excited to discover it actually fits in my linen closet, but only if I find another home for the ironing board. Brainstorming space solutions, I realized that if I hung the ironing board on the closet door, my leaf storage problem might be solved.

I decided to try ready-made options first in my quest to hang the board. I picked up one of these handy dandy things at Bed Bath and Beyond, but it didn't really work because a) I didn't need storage for the iron, just the board, b) my iron didn't fit that nicely in the holder because it's too big, and c) I would have had to install this on the thinnest part of my door because the charming "architectural detail" prevents me from installing it at the top, where it's the thickest.

I really just needed to mount the bottom part of the iron & board holder on the door but couldn't do that without adding ugly washers to the scenario to keep the molded hook thing that came with the kit on the door. As a firm believer in the balance of form and function, I nixed that option.

Then I realized there must be hooks out there in the world that I could install on the top of the door to hang the ironing board. I dug through my hardware box and assorted existing selection of hooks, but none quite fit around the ironing board leg. Next best option was a trip to my trusty local hardware store (the kind of old school place that's just filled with so many parts and bits that it's almost impossible to find anything unless you ask) and came home with a few prospective solutions.

In the end, the simplest option worked best. Look how spiffy my ironing board (with awesome cover from the DeKalb, IL TJ Maxx) looks now. And now the table leaf is no longer in the hallway. I'm so very pleased.